Sunday, November 3, 2013

JAYNES HEARTY BEEF STEW

I am starting this blog out with many of my favorite recipes. The meals I cook often, that have the best mixture of healthy food ratios, and... that are crazy good!!! This delicious Beef Stew is a staple in my home. It is sure to be a crowd pleaser, when the kids friends come over and hang for dinner. The pot is full and there's always room for 1 or, 2 or, 3 more, as they say. No one in our house ever complains when they walk through the door, and get the first whiff of the wonderful aroma's of this delicious, one pot meal. If your house is as "crazy" as mine at times, then you will be happily, store these leftovers, if there are any, for quick night warm ups when the kids are on the go. (don't be put off regarding the number of servings, believe me, and left overs do well for about 7 days, just in the fridge. You can freeze this, but honestly, I never have too. 

I start out a little bit differently than with most stew recipes. I don't use cut up cubes of stew meat. Instead, I use a nice marbled chuck pot roast, that's not too lean. A little bit of fat, is quickly offset by all the "good carbs" of the root vegetables, helps keep the meat moist. Beef is also an excellent source of protein.  For all of us who are trying to loose weight. This is a great dish, as odd as it may seem.

The results are amazing. When cooked low and slow, this cut of meat, is as tender as any could be. And SO easy to cut up, after it's cooked. The meat cuts easily while still hot, and can be tossed right back into the pot again. 

This is when individual preferences come in. There is NOTHING wrong with using chuck stew meat. I just personally prefer the texture and tenderness of this cut of meat more (a pot roast) for stew. What I also love about this meal is that it doesn't have to be eaten the day you make it. Actually, once cooked, and left to sit overnight in the fridge, I think it may taste even better.  The flavors are more blended, and it heats up, in just a few minutes.
Can you tell I've made this a few hundred times?

  
This is a very easy meal to cook, But.... it is, all about the timing.
Which only means that you have... to set a timer
If I didn't have a really loud, annoying, alert, I couldn't function. I get side tracked a lot.
 
Prep Time: 20 minutes, Cook Time: 3 - 31/2 hours, Yield: 8 - 10 servings 
 
Ingredients:
 
3 lbs. Nicely Marbled Chuck Pot Roast
2 tbsp. olive oil (or oil of your choice)
1 medium onion, sliced, then cut, but not diced.
5 medium red potatoes, scrubbed well (peeled or unpeeled) I used red, because it's what I had, but, use the type of potato you like.
4 - 5 carrots, peeled, cut into bite sized pieces
2 stalks celery, sliced
48 oz.+ Approximately (6+ cups) Beef Stock or Broth
1 tsp. Worcestershire sauce
1 tsp. paprika
2 bay leaves whole
2 cloves garlic, minced
1/2 tsp. salt
1/2 tsp. pepper
4 heaping tbs. of cornstarch
4 oz. of cold water
Loaf of Crusty Italian, or Sourdough bread
(If I were cooking this just for myself, I would have also added 8 large mushrooms sliced and, maybe a little cubed orange turnip. Peas work well too, sometimes I add snow peas, if I happen to have them in the fridge. Point here; there is nothing you can't add. (And remember, try to use "fresh", whenever you can.There is no comparison in the taste.)


Directions: 
  • Put the oil into your soup pan, turn on heat to medium/high. I use an electric stove, yuck... but, that for me is at between 6 and 7.
  • Now brown the meat. You want it seared but not cooked... about 5 min. on each side., When it is ready, it will come up easily so you can turn it. Don't get nervous and pry it out, you will leave half your meat, stuck to the pot. The meat is nice and brown, but not burned. If it is sticking to the pan, then it's not ready to be turned. When it is, it will come up easily.  Below is an example is how you want it to look.
  • Ok, this is the major part of the stew, already out of the way. Drain off any excess oil that might be left in the bottom of the pan. Now, cover the meat with the beef stock or broth (whichever you are using, making sure there is enough liquid, not only to cover the meat, but still have enough to take into consideration, how much liquid the carrots and the potatoes, are going to soak up. *if in doubt, add more, water is ok too if you have already used the full 48 oz.*
  • Add the minced garlic, bay leaves, celery, onion, paprika, and Worcestershire sauce. Salt and pepper to taste, only if needed. Stir, to mix.
  • Bring entire pot to a soft boil, then reduce heat, cover, and simmer for about 2 hours, 20 minutes. Set your timer now!!!
  • Prep your carrots and potatoes, put them in a bowl of cold water, and cover, with a paper plate. This is only done, so the potatoes and carrots don't turn that brownish color when they are peeled and left out to the air for a while.
  • Next step... Make a cup of tea, or coffee, find a comfortable place to put your feet up, and read a book, give yourself a new coat of nail polish, play with the dog. You won't have to check your pot now, until your timer goes off. Unless of course, you can't stand the beckoning aroma's that have started to permeate your house, and just have to go into the kitchen to taste.
  • When your timer goes off, yes... you do have to get up now. ;) Remove the cover on your pot, and with a fork, stab the meat and lift it slightly. If the meat is already starting to try to fall apart, that it great!!! Put it back down into the pot and, NOW, add the potatoes and carrots. Turn up the heat just a little bit, to a hard simmer starts again, and cover. Set the timer again for about 25 min. or until the tenderness of your vegetables are the way you like them. *This is the part of the recipe that is very versatile. You can adjust the time you cook your vegetable to the right consistency for you.*
  • Now, check your meat with the fork, again. Try to pick it up slowly... if the meat, is falling apart, and you can see some shredding of it, remove the meat with a slotted spoon *That will be the best tip you've had all day. If you try to take out the entire piece of meat with a fork. It's disastrous and place on a plate. Now, check your vegetables, If they are done to your satisfaction, remove pot from heat, BUT...don't turn the burner off, because you are going to put the pot right back on in a minute... for a few more minutes. I can't even begin to tell you how HOT that mixture is, so be VERY careful, not to give into temptation, and taste it. You will have 3rd degree burns!!! (I do it EVERY time, and want to cry... )
Cut up the meat now, pull it, and cut bite sized pieces, have a mixture of as much or as little of the meat consistency you like. My husband likes chucks of meat. I like smaller pieces, and I especially like the shredded meat. What this means is; that there will be delicious meat, in every spoonful. Since the meat should be so tender, cutting it up should take  just a few minutes. Put your now, cut up beef, back into the pot with your vegetables. Stir together, the cornstarch/water mixture and add to the pot. Stir the pot well and cover again. This will thicken the stew to the perfect consistency.(In my opinion) Bring the pot, back up to a simmer, for about 4 - 5 minutes. 


This is just about ready to serve, and what your stew should look like.
  • TIP: Still too thin for you? Add 2 more heaping tbsp. of cornstarch/2oz.cold water, to the pot and bring back to a simmer for a few more minutes. Too thick for you? Add a little bit of water. A stew should be like a hearty gravy... but everyone has their own favorite way.
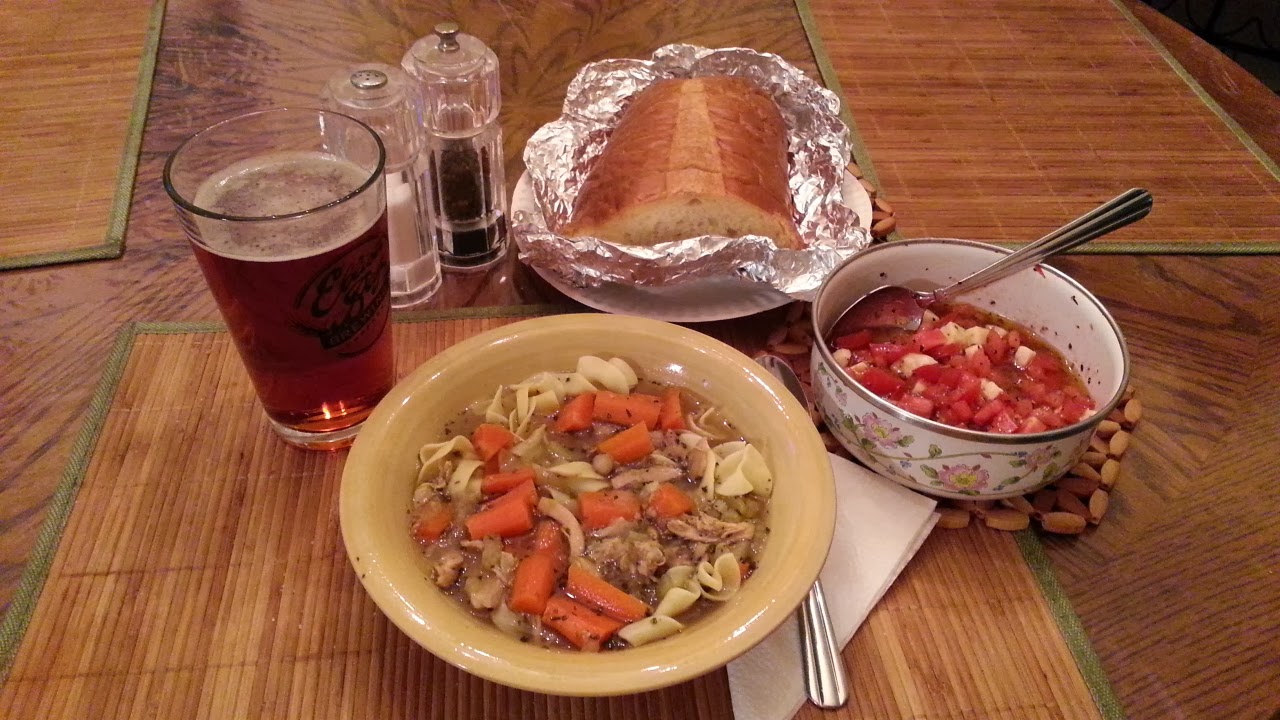
  • Remove the pot from the heat, take out bay leaves, and ladle into deep soup bowls.
  • Slice a nice crusty loaf of Italian or Sourdough bread, and serve.
 
I served the stew, with a crusty loaf of Italian bread, and a simple tomato, mozzarella, basil salad. You will see that little tomato salad on my table many times throughout this blog. I find it compliments so many "hearty meals" with a light and delicious taste.

 NOW ENJOY!

FLAKY CRUSTED TACO PIE

This is a recipe that I have collected, and many of you, have seen it often, being passed around on Social Networks. The reason it is so popular, is that it is... DELICIOUS!!!
I made this the other night for a party, I should have made 3. In the time it took me to serve a slice and trimmings to my husband, the pie was GONE. The kids loved it, and so did I!!!


I made NO changes to the original recipe, when I made the pie pictured above.. It was perfect!!! However, next time I will increase the amount of ground beef, cheese, taco mix and decrease the amount of crescent roll tubes.
The pie, although perfect, should have been fatter. It could have easily held 11/2 - 2 lbs. of ground beef, 11/2 - 2 pkg. Taco Mix *I like Ortega* and double the cheese. Instead of using 2 tubes of crescent rolls, I think one would have been perfect. You should be able to see the meat between the wedges of flaky crust, and once the crust is laid out, there is more than enough left to fill in the center of the pie plate. Either way, the pie is great, and ALWAYS A HIT!!!
 
I am giving you the original recipe. My observations and changes are mentioned above. Then make your own decision. You can't go wrong either way!!!

Ingredients:

 2 crescent roll tubes
 1 LB ground beef 
 1 packet of taco seasoning
 1 1/2 cups grated cheddar cheese
 Shredded lettuce
 1 or 2 diced tomatoes depending on size
 1/2 small can sliced olives if desired
 Sour cream optional
 sliced avocado (optional)

Directions:
  • Pre-heat oven to temperature indicated on the package of crescent rolls
  • Lay out the two tubes of crescent pastry around your pie plate, thick sides in.
  • Use some of the left over crescent rolls to cover the center. *Make sure your bottom layer is not to thick and, is evenly spread out. This ensures that all the dough is cooked through and there are no uncooked surprises because it was too thick in some places.*
  • Brown beef and add taco seasoning.
  • Lay beef mixture in a circle inside of the laid out crescent rolls 
  • Add cheese to the top
  • Pull over crescent rolls and tuck in under meat and cheese.
  • Follow cook time on the package of crescent rolls
  • Remove from oven
  • Add cheese, lettuce, tomato, black olives, jalapeno peppers, onions, avocados, sour cream or whatever you desire for your taco pie, in the middle for garnish.
 
I served the meal buffet style, with small bowls filled with cheddar cheese, refried beans, lettuce, onions, tomatoes and sour cream, to add additional flavors for every one's unique tastes. A nice bowl of Mexican Rice, accompanied the meal beautifully!!!


NOW ENJOY!!!
Original recipe courtesy of: http://www.justapinch.com/


Friday, November 1, 2013

ITALIAN GARLIC MASHED POTATOES

I was born Irish, but after 30 years, married to a man named Giansante, I've learned to cook, at least the Italian basics, really well.
These are my Italian Garlic Mashed Potatoes, and they are outrageous. My girlfriend's mother, turned me on to these, when I was about 10 years old. I've since tweaked it here and there, added a few things, and came up with a side dish that it is always a hit in our house. Flavorful and just the right amount of garlic, (not enough to over power the potatoes.) I don't like breathing garlic fire, after I eat, so you are safe here. This just has such an amazing mixture of texture and flavor.

 
Prep Time: 10 minutes, Cook Time: approximately 15 minutes,
Yield: 4 - 5 servings
 
 
Ingredients:
 
6 medium large potatoes, (about 4+ lbs.) washed, peeled and cut up into small pieces. (They cook faster, and more evenly this way.)
2 large cloves of garlic, minced. (use more, up to 4 cloves, if you really, really like garlic.)
4 oz. butter, sliced into small pieces, leave out at room temp. until ready to use.
1/2 cup grated locatelli cheese, (Romano) (but Parmesan cheese works just as well)
3/4 C. milk (more or less, according to texture preference)
1/8 tsp. dry Italian Seasoning
1tsp. fresh basil, very finely chopped. (use dried if necessary)
1 tbsp. fresh chopped chives (use dried if necessary) *TIP* Instead of chopping chives, I use kitchen scissors, it makes life a lot simpler)
1 tsp. sea salt (use regular salt if necessary)
1/4 tsp. fresh ground pepper
6-7 cups water (to boil potatoes in)
salt and pepper to taste
 
*Don't be afraid to change amounts of things like butter or milk. Some people like their mashed potatoes creamy, others lumpy, so add or decrease, according to preference. These are a little bit of both.
*TIP* The key to great mashed potatoes is not over mixing them.
Otherwise, you get potato glue. *LOL*
 
Directions: 
  • In a large pot, that you can use an electric or hand mixer in, add the water and salt, and bring to a boil.
  • Once water is at a rolling boil, add potatoes, and minced garlic. Cook for about 25 minutes, or until desired tenderness. Drain the potatoes, and put them back in the pot.
  • Add cheese, Italian seasoning, pepper, basil, chives and butter.
  • With hand masher first, smash those potatoes. (This cuts down on how long you have to mix) Now use electric mixer on whip, begin to mix the Potatoes, while slowly adding the milk. Rotate the bowl as you mix. *Remember, don't over mix*
  • Stop adding the milk once you have the consistency you want, (I like them somewhat "lumpy"), salt and pepper to taste. Serve while hot.
NOW ENJOY!

RIGATONI PASTA PIE

I have collected tons of recipes over the years. But I have to say, this is one of the best. It is impressive to look at, and incredibly, delicious to eat.
I would like to be able to take the credit for this brilliant work of art, and mouth watering recipe, but I can't. I found it online one day, and tucked it away for a "can do" meal. This is the 3rd time I've made it. And you can be sure it will become a staple of this household.
I will confess I did change a couple of things, but, only for my personal taste preference though.
This is a spot on recipe. If you follow the directions. It will come out perfect every time.
What I loved about it was, that it was actually easy to make and not nearly as time consuming as I thought it would be. Your friends will truly be impressed, if served at a brunch or pot luck dinner.

 
Dinner was just for my me and my husband the other night, and we were glad *LOL* We didn't have to share this beautiful piece of culinary artistry with anyone, and just "pigged" out !!!
It would be perfect with a nice a merlot, or even a zinfandel, red wine, but this night, we choose a hearty beer. Sammy Adams Lager on the left, a Sierra Nevada for me, on the right. I probably have a glass of beer. about 5 times a year!!! Because I like it too much!!!  *LOL* 
Ingredients:
 
 1 lb. rigatoni pasta
 1 lb. ground beef 
 2 garlic cloves (minced)
 1/4 teaspoon fresh ground pepper
 your own homemade sauce (or 1 jar of  your favorite store bought spaghetti sauce)
 salt
 1 cup finely grated Parmesan cheese
 2 cups grated mozzarella cheese
 15oz ricotta cheese 
(The original author of this recipe also added 4oz. cream cheese. I did not. With name like "Giansante" I just couldn't make myself do it *LOL*)
 2 eggs
 1 tsp. basil
 1 tsp. oregano
(This is where preference comes in. I associate oregano with pizza, not my Italian meals. It's taste is noticeable and for me, I didn't want the "pizza" flavor, so I omitted it.)
 1 cup onion
 spring form pan
 cooking spray
 
Directions: 
  • Boil the noodles according to the directions on the box.
  • Stop cooking when they're still very firm and avoid stirring more than once, so they do not fall apart.
This is really important, because you don't want the rigatoni to break or tear.
  • Once done, drain and run cold water over so they are cool enough to handle. .
  •  In a large skillet, brown the ground beef and then, drain excess grease.
  • Add chopped onion and garlic. (cook slow and low, stir often, you don't want your onions and garlic brown, when the onions are translucent and a golden yellow color, proceed to the next step.)
  • After about 5 minutes add cream cheese and stir until melted.
I do not add the cream cheese when I cook this meal.
  • Add spaghetti sauce next. (I used the equivalent of about 1/2 a jar.)
 Use a small mixing bowl to mix the ricotta, Parmesan, basil, oregano (I left this out) and 2 eggs until smooth. (I also added salt to taste and parsley instead of oregano. With the exception of raw pork and chicken, I really do taste as I go. *LOL* 
 

  • Set the mixture aside..
  • Use cooking spray on the bottom of the spring form pan first to avoid sticking.
  • Tightly pack pasta into pan, standing each piece on end
 

  • Put a zip lock bag inside a tall glass and fill the bag with the cheese mixture.
  • Close the bag and snip the corner of the bag and pipe a small amount into each noodle until it's full.

 
  • After piping the mixture into the pasta tubes. Gently bang the pan down straight on a good work surface a couple of times, packing down the cheese filling and sauce. At this point if your pasta tubes have room left, fill them up again. The more you can pack in the better it tastes *LOL* (I repeated this step one more time, but it probably isn't necessary.) 
  • Pour the red ground beef sauce over the whole top and push down as much as possible, without squashing the pasta of course *LOL*.
I went astray on this step too. I added the remainder of the pasta sauce over the noodles first, about 1/4 cup since I did not add the cream cheese to the meat mixture. Not too much, you don't want to drown them either.  I just like a bit more sauce that what was called for in the original recipe. I thought it was a tad too dry in the pasta section, the first time I made it. (Again, ...this is a personal preference.) I poured the sauce alone, on the top so it would seep down into the pasta.
Then, I added the red ground beef mixture.
 Top with 2 cups of mozzarella cheese. (Recipe calls for 2 cups but you can use low fat or skim if you are looking to cut calories.)
  •  Bake at 350 for 20 minutes and...
  •  Then broil until the cheese turns bubbly. (watch this last step closely, you don't want the mozzarella to burn, just a little brown and very bubbly, otherwise the cheese will get hard!!! And we certainly don't want that. If you are worried you will get distracted, you can even omit this step. It really won't make a difference. I actually prefer it without broiling at the end.)
 
 
Serve with a small bowl of sauce, in case anyone wants more. A crusty Italian Bread, and a nice glass of wine. And, if there's room, a nice light salad, tops the meal off!!! I like a simple little cucumber salad with it. 8D
 
 original recipe courtesy of: http://tinyurl.com/rigatoni-pie
 

NOW ENJOY!!!


BREAKFAST QUICHE

This is a family favorite in my house. I've tried tons of different variations for this recipe, but, I know what my family likes too. The great thing about this recipe, is that it is very versatile. You can add, or delete, anything you want... and it's always awesome. This is a great dish for a Sunday brunch or, even a potluck dinner. The possibilities are endless.


 Prep Time: 30 minutes,  Cook Time: 48 - 50 minutes, Yield: 1 9-inch quiche

 Ingredients:

Crust: (A pretty standard crust for a quiche, and so simple to make, that you truly won't believe it)

 11/2 cups all-purpose flour
 1/2 teaspoon salt
 1/4 teaspoon baking powder
 1/3 cup olive oil
 4 tablespoons milk


Filling for the Quiche:

 2 - 3 small/medium cooked, cooled potatoes (I microwave them) Once cooled, then peel.
 11/3 cups shredded mozzarella cheese
 1 Large Onion, diced and sautéed
 6 very large mushrooms, sliced and sautéed
 2 cloves garlic, minced and sautéed
 (I sauté all at the same time. First adding the mushrooms, then onion, and finally the garlic. They are ready when the onions are translucent, but you don't want to brown or burn anything, so for this part, stir often).
 1/4 cup grated Parmesan cheese
 6 slices bacon, cooked and crumbled
 5 large eggs
 1 cup milk
 1 tablespoon thyme
 3/4 teaspoon sea salt (regular salt is fine too)
 1/4 teaspoon freshly ground black pepper


Directions:
Make your crust first, this step takes all of 3 minutes, Honestly! I got so excited making this, that sadly I did not take step by step photos. But... this recipe is so easy, I think you will all have no problem. Next time I make this, I will add a few, I promise ;)

•Preheat your oven to 425 degrees. In a bowl mix the flour, salt, and baking powder with a fork. In a separate bowl mix together the oil and water, then pour over this over the flour ingredients. Stir with a fork until the dough is moistened and crumbly.
•With clean hands of course, pat down the dough across the bottom of a deep dish 9" pie pan and work it up the sides of the pie pan. Try to keep the thickness even as you move the crust around and up the sides of your pan. Prick the bottom of the crust with a fork liberally, and bake for 9 minutes. Remove from oven, set aside and allow to cool.
•At this time, lower your oven temperature to 350 degrees while you begin to prepare the delicious filling.
•Cube the potatoes and evenly spread across bottom of the crust, (I smash a few as I go),cover the layer of potatoes with the sautéed onions, the mozzarella cheese, then the Parmesan cheese on top of that. Then your sautéed mushrooms and crumbled bacon on top of  that.
•In a large bowl mix well, the eggs milk, thyme, salt and pepper with a fork. Slowly pour over the filling you just layered into your crust. Be careful here, do it slowly so nothing runs over the pie pan rim. You want all that mixture to seep down into the other ingredients.
•Place your pie pan into the oven, and bake for about 45 - 50 minutes until center is firm. Test with a toothpick. If it comes out clean, it's done. Remove from oven and allow to set for at least 15 minutes before slicing.

NOW ENJOY!


CINNAMON APPLE LOAF

I am not much of a sweet eater, but... I love having something delicious and satisfying when I do get the urge!!! It's always great to have something "home made", that you already know is awesome, when friends stop by too!!!
This is the time of year that I pull all the "Fall" Recipes out, and... where I look for things that are wholesome, delicious, and don't take too much time to make.
I love this!!! It's not a cake, and... it's not a bread. It is between the two. *LOL*. I look forward at night, to having it in the morning, and so will your family... lightly toasted with a little butter. Mmmm... it doesn't get much better than this!!!
The recipe is quick, and made from scratch. You really can't make a mistake, unless you undercook it. But we will watch this step closely. It doesn't require a lot of ingredients, and... You will be so, happy later... that you took the time. If you have 5 more minutes, then MAKE 2!!!
 
 
Ingredients:
 
1 1/2 cups all-purpose flour
2/3 cup white sugar
1/3 cup brown sugar (not packed)
2 eggs
1/2 cup butter, softened
1 teaspoon ground cinnamon
1 1/2 teaspoons vanilla extract
1 3/4 teaspoons baking powder
1/4 cup milk
1/4 cup apple juice
1 apple, peeled and chopped
Loaf Pan
Electric Hand Mixer

*missing from photo: milk and apple juice*
Directions:
  • Preheat oven to 350 degrees
  • Lightly grease a Loaf Pan. (I use a bit of butter on a piece of wax paper.)
  • Mix brown sugar and cinnamon together and set aside. (leave a handful aside for the top of your loaf too.)
  • Beat white sugar and butter together in a bowl using an electric mixer until smooth and creamy
  • Beat in eggs, 1 at a time, mixing
  • Add vanilla extract
  • Combine flour and baking powder together in another bowl
  • Stir into creamed butter mixture.
  • Add milk and juice, into batter, mix until smooth.
  • Pour half the batter into the greased loaf pan
  • Add half the apples and 1/2 the brown sugar cinnamon mixture
  • Push down  a little bit on the apples and sugar mixture, into the batter with the back of a spoon 
  • Now, lightly swirl apple mixture into batter with a fork, you don't want to mix it, but you do want those nice brown swirls to be seen throughout the batter
  • Pour the remaining batter on top; layer with remaining apples and more brown sugar/cinnamon mixture. Swirling again, through the dough you just poured. You want to see some nice brown swirls in the dough again.
  • Add more brown sugar/cinnamon mixture to the top of your loaf. This will become the nice crumbly topping.
  • Bake in the preheated oven until a toothpick inserted in the center of the loaf comes out lean... (about) 40 to 45 minutes. I use an electric oven, so check at 35 min, if you have any doubt.
It doesn't get any better than this!!!

 
NOW ENJOY!

HEARTY CHICKEN SOUP

Some people seem to think that making Chicken Soup from scratch is an all day affair. If it was, I wouldn't be making it believe me... It is well worth the few minutes of preparation, to see the empty bowls at the end of the meal.
I look at Chicken Soup, as an entire meal, if cooked correctly. It should have a good balance of vegetables ~ proteins and YES... fats. This fits the bill to perfection. Add a small light salad, and some warm toasted, crusty Italian/Sourdough Bread, and you have the "Perfect Meal". We added a nice, Dark Oktoberfest Beer, but a glass of red wine would have been equally good ~  
  
This particular recipe was prepared and cooked, with 1/2 an already roasted chicken, which is why I chose the ingredients I did. If I am making this soup from the very beginning with a raw chicken, I do change a few ingredients, and prep a little differently, which I will note, at the end of this posting. This recipe well feed approximately 4. 
 
Ingredients: 
1 - 1/2 Already cooked, Roasted or Rotisserie Chicken
48 oz. Chicken Stock, or Chicken Broth
1 C water
4 Carrots, *peeled, and sliced* (Place in pot of cold water and set aside)
2 Lg. Celery Stalks
1/2 Lg. Onion *sliced (then coarsely diced)
3 cloves Garlic, minced
2 tsp. Bells Seasoning
2 Bay leaves (Lg.)
1/4 tsp. thyme
1 tsp. Basil
1 tsp. Parsley
2 Lg. fresh sprigs of Sage (or 1/4 tsp. dried)
1/2 tsp. Rosemary
1/2 tsp. Salt (I prefer sea salt)
1/2 tsp. Paprika
Pepper to taste (I prefer fresh cracked black pepper)
1/2 pkg. of Egg Noodles
6 quarts water (to cook noodles in)
Salt
4 drops olive oil

Alternatives: (you can also add 1/2 half diced orange/yellow turnips (needs to be added in the last 25 minutes left of cooking), or snow peas, as many as you like, (in the last 15 minutes of cooking as well...) each ingredient, only adds more to the soups flavor. But don't overdo it either. There is a lot to be said for simple, hardy, down home fare.) 

Directions:
  • Cut/Separate the Chicken into large pieces.
  • On a medium setting/flame; In a soup pot, add the Chicken Stock/Broth and water.Add - Bay leaves, onions, garlic, celery, salt, pepper, spices and stir well, then add chicken parts, with skin left on. (OH Yuck, you say?... This is where all the flavor is!!! It will be removed before serving, don't worry.)
  • Let the mixture warm up. Once the chicken is warm, remove from the pot. to a plate, with your fingers, remove the meat from the bones (so much easier than if the chicken was cold.) Pull in chunks, or shred or both (which is what I do).
  • Now take all cleaned long bones; wings, legs thighs etc. make sure there are no other little bones, or pieces that could snap off attached, and put them back in the pot (there will probably be only 4 or so and they are large enough to easily be removed later.)
  • Add the Chicken... back to the pot, Stir well, bring back to a slow boil, cover, reduce heat to simmer, and simmer for 45 minutes. *By now your house is smelling like you have been cooking for hours instead of 20 minutes.        
  • Add the carrots (make sure you drained them) in the last 20 - 25 minutes, and bring the pot to a high simmer.
  • Taste now. Add salt and pepper if needed, and cover pot again.
  • In a separate pot, add water, salt to preference, and olive oil. Bring to a rolling boil.
  • Add Egg Noodles, and cook according to package direction.
  • Once noodles are at desired tenderness, remove from heat and stain.
  • When the carrots are done to your desired consistency, the soup is done too. Taste for salt and pepper.
  • Remove...Bay Leaves, Bones, and Skin from soup. Mix Soup Well. Taste, add salt and pepper if needed.
  • Serve: Place noodles in bottom of soup bowls, cover with a ladle or two of soup, mixing gently with a spoon, and Serve. 


Best Served with a nice crusty, warmed Italian/Sourdough Bread, and small light salad!!!
 
NOW ENJOY!!!
 Directions for making soup with a whole, uncooked chicken: 
This should yield 8 -10 servings  
NOTES: When I make Chicken Soup from scratch, I DO follow the main recipe above, with just several small exceptions.
I add the WHOLE chicken, *cleaned and giblets removed* to large soup pot.
Salt and Pepper it liberally.
I then sprinkle the whole chicken with paprika. (I leave this part out on already cooked chicken recipe above, using just a small amount for flavoring instead.)
Add enough water to cover the entire chicken and carrots to come, allow for some reduction of the liquid as well.
(I omit the Chicken Stock/Broth here) The water is taking it's place now.
I add all ingredients to the pot, except the noodles and carrots now. ***Amounts of ingredients, all double for a whole chicken here.*** 
I bring the Chicken to a slow boil and cover. Cook time: according to weight and package.
In the last 1/2 hour, add your carrots
At this point, once cooked.... This is what is called, "Chicken in a Pot"... which is seen on many memorable restaurant menus.
Once your chicken is cooked, with no red juices flowing when pierced with a fork, and legs are easily removable, Remove Chicken from stock, and place on plate large enough to remove the amount of chicken you desire. Cover pot, and remove from heat here while preparing chicken.
Remove chicken from bones, (BUT allow to cool a bit before you begin, otherwise you will burn your fingers lol ) cut up Chicken in pieces, chunks and pulled, then... add Chicken pieces back to the pot.
Replace pot on heat, mix well with wooden spoon, and simmer, covered for 5 more minutes
Your noodles should be cooked now. BTW: they don't have to be... Egg Noodles, add whatever suits your fancy. Bow Ties, Spirals, etc.
Spoon noodles into soup bowls, and then ladle the soup on top, mix gently with spoon, and serve.

FRENCH ONION SOUP

If you want to ensure that everyone asks for seconds, this is the soup for even the most finicky family eater!!! Flavorful, robust, with an exquisite taste. So easy to make, you won't believe it. Your friends will think you were slaving over a hot stove in France all day!!! This is my family's favorite soup!!!
 
 Prep Time: 15 minutes,  Cook Time: 30 - 40 minutes +Bake 15 min , Yield: 6 -8 servings
  
Ingredients:
 
4 -5 really large yellow onions (you can never have enough onions as far as I'm concerned) 
3 cloves of garlic - minced 
1/3 cup  salted butter (you can add more, but I don't think it's necessary, and you don't want an oil slick on top of this delicious soup either) Many cooks use unsalted butter for this, I personally think it takes away from the flavor. As an RN, I know some people are limited, but... if you think about it, you are getting an 8th of the amount, and not enough to cause anyone a problem. The choice of course is yours however.
1 cup red wine (I used a Zinfandel, but any red wine will do. This is what adds that delicious flavor, and leaves no alcohol in the soup, once it is cooked down)
3 bay leaves. (I am probably the only person I know that has a real bay tree in her dining room *LOL* It does not tolerate NJ winters so I have to bring it inside each year. I use bay leaves in almost everything.)

Our Bay Tree!!!

1 tsp. thyme, a bit more if you enjoy the taste. (I grow my own fresh herbs, so I used several fresh sprigs. By the time the soup is done, only the stems are left, and are easy to remove.) 
Sea salt and ground pepper to taste 
21/2 - 3 cups Beef Stock ( I make my own beef stock when I cook dishes like pot roast etc. and then freeze them, but, beef broth is perfectly acceptable, and will not deter from the taste).  
4 large heaping tbsp. of flour (all purpose is fine) 
1 loaf of crusty Italian, or sour dough bread, sliced about an inch wide, diagonally. 
1 lb. Gruyere cheese, sliced or grated, your choice. (I grate mine, because it melts faster)
 
Directions:
 
•peel and slice the onions. (This is the hardest part *LOL*) Honestly, I swear!!!
 
  •  Slice the butter into small pats, and place them in the bottom of your soup pot to melt under a med/low heat. You don't want to burn the butter. If you do, toss it and start again.
  • Once the butter has melted, add the onions, bay leaves, thyme and garlic and, cook on medium heat until the onions are translucent *caramelized* This takes about 30 minutes. Stir often. Again, you don't want them to burn or brown, so make sure the mixture is coated well with the butter while cooking. Don't be alarmed when it looks like the onions are going to fall out over the pot. Once they begin to cook, they will reduce in size quite a bit. But This is what your pot should look like in the beginning.

  •  Now add the wine, and bring to a soft boil. (Left picture) Then reduce the heat to simmer until the wine has reduced and the onions are a burgundy red, with no excess liquid left. (Right picture) By this time, your house smells delicious, is beckoning all your neighbors, and all of a sudden, everyone is waiting for it to be done)
     
  •  Now add your beef stock or broth and simmer again for about 10 -12 minutes. 

  •  Add sea salt and pepper to taste. (It should make you knees weak with pleasure *LOL*) 
  •  Place your bowls on a baking sheet to ensure nothing bubbles over and makes a big mess in your oven.  Remove the bay leaves, and thyme stems if used now. Using a ladle, fill your ramekins or onion soup crocks, leaving just enough room for the bread and cheese.
 
  • At this point preheat your oven to 375 degrees
  •  Place one slice of your bread into each crock.  
  • Now, generously add the gruyere cheese on top of the bread. (I like lots of cheese :) I was "crazy" in the kitchen at this point and forgot to take a picture of this cheese topped delicacy before I popped it into the oven).
  • Place your cooking sheet in the oven and allow the soup to bake for about 15 minutes or until the cheese is a golden brown and nice and bubbly.
  • *If you want to rush the process, you can also place under the broiler for 5 -7 min, or until brown and bubbly.* 
  •  Here is your finished product. A glass of the remainder of the red wine you used to cook with is the perfect addition, but, NOT a necessity ;)

OMG, in my opinion, this is about as good as it gets!!!
 
Believe it or not, you will be full, after this little bowl, but it is also the perfect
dish before a big family meal.


NOW ENJOY!
 

Wednesday, October 30, 2013

CREAMY, FALL VEGETABLE, CHICKEN CHOWDER

I love this time of year. The foliage is bursting with color, the weather is cool. boarding on nippy depending on where you live, and that's when I start thinking about soup.
I love soups of all kinds. Fall Soups, should be hearty, and colorful, in my "crazy" mind anyway. I especially love creamy soups, most of all. I was born in New England, where chowder, is a way of life.
It's also a fairly quick soup to make. I love this particular combination too. This is a creamy soup, but not overly thick, although that... depends on how much cheese you use.
This Chowder is great for left overs too, because it contains no butter and as long as it's not brought to a hard boil, it will not separate like most cream sauces and soups do.


Prep time: 30 min  Cook time: about 30 min. Servings: 5 - 6

Ingredients:

5 small to medium Potatoes, peeled and cut into bite sized pieces
5 nice, and not too thin, Chicken Breasts, or cutlets. (These are going to be cut up into bite sized pieces later too. So judge the thickness of your chicken)
3 large Carrots, peeled and diced
8 oz. package of fresh Mushrooms, cleaned and sliced
1/2 medium onions
2 cloves of garlic, minced
2 stalks Celery, split down the middle and sliced
3/4 Cup Locatelli Romano Cheese
1/4 cup Locatelli Romano Cheese to coat the chicken
Nutmeg (I shave nutmeg nuts, until I think it's right *LOL*. If I had to guess, it would be about an 1/8 tsp. to a 1/4 tsp. This is where taste as you go comes in,)
Salt and Pepper to taste
(a handful of fresh spinach if you have it. This is completely optional. I had a little left in the fridge and decided to throw it in there, after I wilted it first. Be careful here. Spinach can over power a soup, so if you do use, remember, only a handful.)
1 can Cream of Chicken Soup, undiluted
60 oz. Chicken stock or broth.
2 cups 1/2 + 1/2
1 Large Bay Leaf
4 tbsp. cooking oil of your choice.
2 tsp. green onions *green stem* optional for garnish
2 tsp. green onion bulbs *white bulb*


Directions:
  • Salt and Pepper Chicken Breasts to taste,
  • Dredge Chicken in 1/4 Romano Cheese (use more if needed)
  • In a large fry pan, add the oil, and sauté Chicken Breasts, on medium heat, for about 4 - 5min on each side. This depends on how thick they are. More time if thicker, less time if on the thinner side(Do not try to lift them before they are ready though, or the coating will stick to the pan.)
  • Remove from heat onto a paper toweled plate, and allow to cool until able to handle. In the meantime
  • Bring a Large pot of water to a boil, add salt to taste, potatoes, carrots and celery and cook until medium tender, 10 - 13 minutes. Or, until tenderness of your preference.
  • Drain, and set aside.
  • In the same fry pan used for the chicken, add 2 more tbsp. oil, and sauté mushrooms on medium heat, stirring often. You don't want them to start to burn, for about 5 min. Then, add onions and garlic, and cook until onions are translucent and a golden yellow color. Mixing frequently... you don't want the garlic to brown either. Once done, remove from heat and place on a paper toweled plate and set aside.


  • Now, cut up your chicken into bite sized pieces.
  • In a large soup pot, add your chicken stock or broth, cream of chicken soup, bay leaf, salt and pepper to taste, and bring to a slow boil.
  • Add chicken and the white bulbs of the green onions to the pot, continue to simmer for 4 minutes.
  • Now add the sautéed onion mixture, and vegetables to the stock, and simmer for 4 min. more. (If you are using  wilted (steamed) spinach, add now.)
  • Add 1/2 + 1/2. Stir well.
  • Add the remaining 3/4 Cup Romano Cheese. Stirring well, until mixed in.
  • Simmer for 4 more minutes.
  • Taste for salt and pepper (If you want your soup thicker, add more cheese, thinner, add more 1/2 + 1/2, But... remember, you are not making a stew)
  • Add nutmeg, stir well. Ladle into soup bowls, garnish with the sliced green stems of the green onions, and Serve.   
 

~~Delicious~~
Serve with a light salad!!! 


NOW ENJOY!

Sunday, October 20, 2013

TORTELLINI ALFREDO BLUSH CASSEROLE

In an Italian household, comfort food, is usually synonymous with "Pasta". And... there is a reason for that... The reason, is a meal like this!!!
Every one of my Italian friends and family, have a version of this dish in their recipe book, and I, am no exception. The aroma is delightful, and makes you feel like you are getting a big hug, with each, delicious mouthful.
In our house, this is a leftover meal. *LOL*. I always have pasta sauces, either half containers from other meals, or frozen. There is always mozzarella and Parmesan cheese. *In my case, we use Locatelli, Pecorino Romano Cheese on our table, exclusively. (That is just personal preference though.) And there is always pasta.
These are all Italian staples, and ingredients are usually on hand.
It is quick, easy and outrageously delicious. Even the pickiest of palettes will not be denied.
The key to this meal, is the balance of the ingredients, so that nothing overpowers the delicious stuffed pieces of pasta. Even with the use of all the cheese's involved, the meal is still light. *Remember to taste as you go*, and don't be afraid to "stray" if you get inspired. That's how you learn what ingredients blend well with each other.
As with every Pasta meal, you can't go wrong with a crusty Italian Bread, and a light salad.

Prep. Time: 15 min.   Cook Time: 15 - 20 min.   Servings: 3

Ingredients:
1 bag of frozen cheese filled Tortellini (16oz.)
1 jar of Alfredo sauce - about 12 oz.
1/3 jar of Marinara/Tomato sauce - about 4 oz.

1 Tbsp. dried Basil
1 tsp. Garlic Powder
1/2 Cup shredded Mozzarella Cheese
1/2 Cup grated Parmesan Cheese

salt and pepper to taste
All the ingredients are subject to greater or lesser amounts, (Except the tortellini) depending on your personal taste preferences. When I make this dish, many times I make my own Alfredo Sauce, and usually, there is frozen homemade pasta sauce in the freezer. (Thanks to my husband, who doesn't know how to cook, unless it's in massive quantities.) Use your eye when you mix the sauces. Look for the color of the sauce you see. Add more or less. ***Taste the sauce before you pour it over the tortellini***, and adjust it, if you want to taste more of something.

Directions:
Preheat the oven to 350 degrees.
Bring 5qts. Salted Water to a rolling boil, and cook the Tortellini, according to package directions. .
While pasta is cooking, in a microwaveable bowl, mix the Alfredo sauce and Marinara sauce together. (The mixture should be light pink in color)
Add Basil and Garlic Powder.
Mix well
Taste for salt and pepper
Heat the sauce mixture to a near boil in microwave,
Shred mozzarella cheese
In an 8x8 square baking dish, put Tortellini, and Pasta Sauce, and mix well.
Add shredded Mozzarella Cheese on top
Add Parmesan. cheese on top of that
Place in oven, and Bake for 15 - 20 minutes, until cheese is nice and bubbly.
Remove from oven, and Serve Immediately!!!

  I served this with Italian Bread and a light Cucumber Salad
Delicious!!!
NOW ENJOY!!! 

Wednesday, October 16, 2013

CUCUMBER SALAD

Salads have become a staple with most meals I cook at home. I try to balance carbs with good proteins, and at least a side vegetable or salad.
Salads can be everything meals. But... when I cook, I like light, flavorful salads, especially in the Fall, that are not going to make me feel more full, after eating the main dish.
In our Italian house, we eat the salad at the end of the meal. So... it must cleanse the palette and leave you refreshed and satisfied. A simple cucumber salad meets all those requirements. And... cucumbers are a natural fat burner, which is always nice, and a definite plus!!! This salad will be an automatic hit, as long as you "Taste as you go".

 
Prep time: 10 min.   Cook time: None    Servings: 3
Ingredients:

1 Cucumber, peeled, and sliced very thin
1/2 medium Onion, sliced very thin, and then cut in half
Salt and Pepper to taste
3/4-1 Cup Water (more or less to taste preference.)
5-6 tsp. White Vinegar (more or less to taste preference.)
Garnish with a pinch of Fresh Dill (optional)

Directions:
  • In Serving Bowl, add Cucumbers and Onions
  • Salt well, *this is important, under salting cucumbers can mean the difference between a great salad and a bland salad*.  
  • Add Pepper to taste
  • Add Water (more or less to taste preference.)
  • Add Vinegar (this is important, Taste here... you want to add enough vinegar to know that it is a bit more, than just water. But, too much vinegar will make everyone pucker. *LOL* There must be the proper balance.)
  • Taste again, add Salt if needed
  • Mix well, Garnish, and Serve!!!
 
NOW ENJOY!